How to rip narrow boards with a circular saw?
Table of Contents
Tools and Materials Needed
- Circular saw
- Rip guide (or edge guide)
- Clamps
- Workbench or sawhorses
- Measuring tape
- Pencil or chalk
- Safety gear (gloves, goggles, ear protection)
Steps to Rip Narrow Boards
- Prepare Your Work Area
- Set up a sturdy workbench or use sawhorses.
- Ensure the area is free from obstructions and has adequate lighting.
- Measure and Mark the Cut Line
- Use a measuring tape to determine the width of the cut.
- Mark the cut line with a pencil or chalk along the length of the board.
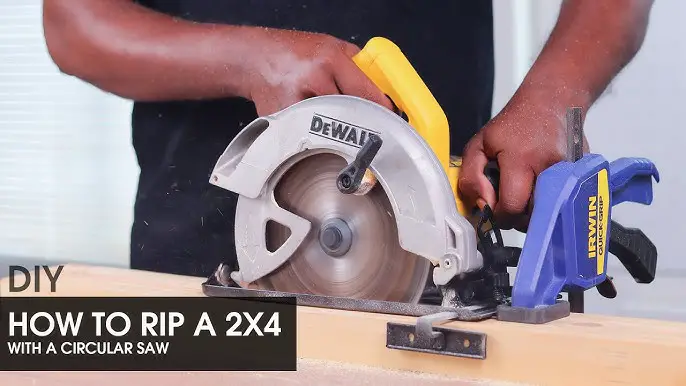
- Attach a Straightedge or Rip Guide
- Secure a straightedge (e.g., a piece of scrap wood or a commercial guide) parallel to the cut line.
- Clamp it firmly to the board so that the circular saw base can ride against it for a straight cut.
- Secure the Board
- Clamp the board securely to prevent movement during cutting.
- Make sure the clamps are clear of the saw path.
- Adjust the Saw Depth
- Set the blade depth to about 1/4 inch deeper than the thickness of the board. This ensures a clean cut without excessive resistance.
- Make the Cut
- Position the saw against the rip guide.
- Start the saw and allow the blade to reach full speed.
- Slowly and steadily push the saw along the guide, keeping consistent pressure.
- Keep your hands and body clear of the blade’s path.
- Smooth the Edge
- After the cut, inspect the edge.
- If necessary, use sandpaper or a plane to smooth out any roughness.

Tips for Success
- Use a Rip Fence Attachment: Many circular saws come with a rip fence that attaches to the saw, simplifying narrow board cuts.
- Consider a Track Saw: If you frequently rip boards, a track saw may offer better precision and ease of use.
- Safety First: Always wear protective gear and ensure your saw blade is sharp and appropriate for the material.
- Go Slow: Cutting too fast can cause the blade to bind or veer off course.

Pros and Cons of ripping narrow boards with a circular saw
Pros
- Portability: Circular saws are lightweight and easy to transport, making them ideal for on-site or outdoor projects.
- Cost-Effective: Circular saws are generally more affordable than table saws or track saws, which can perform similar tasks.
- Versatility: Circular saws can cut various materials, including wood, plywood, and composites, with the right blade.
- Small Space Usage: Unlike a table saw, a circular saw doesn’t require a dedicated workspace or large footprint.
- Flexibility with Guides: Using a straightedge or rip fence enhances precision, allowing the saw to mimic more advanced tools like track saws.
Cons
- Precision Challenges: It’s harder to achieve perfectly straight or smooth cuts without additional guides, and even with them, results may not match a table saw’s accuracy.
- Safety Concerns: Circular saws can kick back or wander, posing risks, especially when handling narrow boards.
- Setup Time: Additional time is required to set up rip guides or clamps, which can be tedious compared to using a table saw.
- Blade Limitations: The smaller blade size and limited adjustability might make it difficult to rip very thick or hard materials effectively.
- Manual Operation: Precision relies heavily on the operator’s skill and steadiness, increasing the margin for error compared to table-mounted tools.
- Workpiece Stability: Narrow boards can be difficult to clamp securely, leading to potential movement during the cut.
FAQs
What is the tool called that you use when ripping narrow boards on the table saw?
The tool commonly used for ripping narrow boards on a table saw is a featherboard. It’s designed to keep the board pressed firmly against the fence, ensuring a straight, safe, and clean cut.
Featherboard
Function: Applies consistent lateral pressure to the board, keeping it snug against the fence.
Why Use It: Prevents the board from shifting or wandering during the cut.
Types: Magnetic featherboards or those that attach to the miter slot.
How to be Safe While Ripping Using a Circular Saw?
1. Wear Proper Safety Gear
Eye Protection: Use safety goggles to shield your eyes from sawdust and debris.Hearing Protection: Use earplugs or earmuffs to protect your ears from the loud noise.
Dust Mask: Wear a dust mask to avoid inhaling sawdust.
Gloves: Optional but ensure they fit snugly and don’t interfere with tool operation.
2. Inspect and Maintain Your Saw
Check the Blade: Ensure it is sharp, clean, and appropriate for ripping wood.
Secure the Blade: Make sure the blade is tightened securely.
Inspect the Cord and Tool Body: Look for wear or damage that could cause malfunctions.
3. Secure the Workpiece
Clamps: Use clamps to hold the board securely to your workbench or sawhorses.
Stable Surface: Ensure the surface is level and the board is fully supported.
4. Use a Guide for Straight Cuts
Rip Guide or Straightedge: Attach a guide to the saw or clamp a straightedge to the board to guide your cut and ensure accuracy.
5. Set the Blade Depth Correctly
Adjust the blade depth to about 1/4 inch deeper than the thickness of the board. This prevents excessive blade exposure and reduces the risk of kickback.
6. Start the Saw Properly
Position the Saw: Ensure the saw blade is clear of the board before starting.
Full Speed First: Let the saw blade reach full speed before beginning the cut.
7. Maintain Proper Hand and Body Position
Hand Placement: Keep both hands on the saw handles, and your hands away from the blade path.
Body Position: Stand to the side of the saw, not directly behind it, to avoid kickback risks.
8. Cut Slowly and Steadily
Avoid forcing the saw through the wood; let the blade do the work.
Maintain consistent pressure to prevent binding or veering off course.
9. Plan for the Cutoff Piece
Ensure the cutoff piece can fall freely without being trapped or pinching the blade.
Use supports for long boards to prevent the cutoff from tipping or binding.
10. Turn Off the Saw Safely
Release the trigger and wait for the blade to stop spinning completely before setting the saw down.
Never reach for the cutoff piece until the saw has fully stopped.
11. Be Mindful of Kickback
Avoid Binding: Keep the saw aligned with the cut to prevent the blade from binding.
Use a Splitter or Riving Knife: If available, these tools reduce the risk of kickback.
12. Keep Your Workspace Clear
Remove any obstructions, debris, or cords that might interfere with the saw or your movement.
READ ALSO: How to rip a board with a circular saw?