Cutting a tree sounds easy, but it’s more complicated than you can imagine. It’s a challenging process. It would be best if you had powerful tools like chainsaws to deal with them, yet, using one is not an uncomplicated challenge.
To your rescue, we are here to help you get educated about how to cut down a tree with a chainsaw. So stay with us and find out.
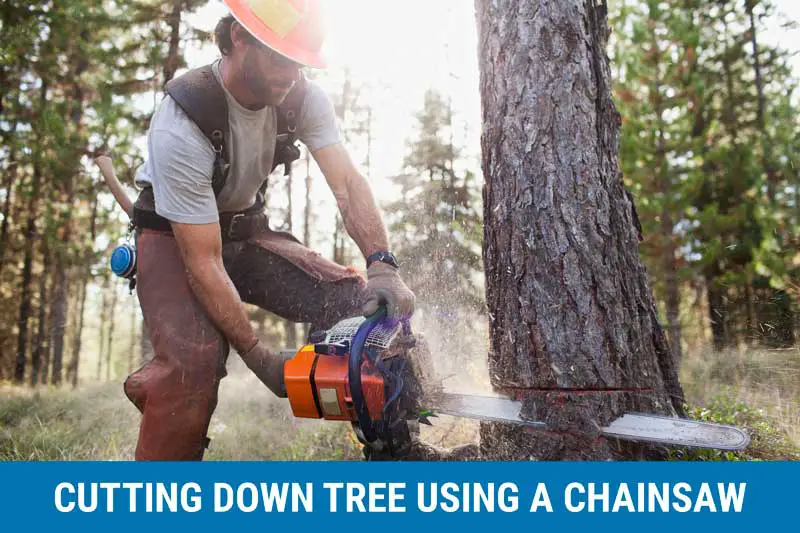
Guide On How To Cut Down A Tree With A Chainsaw
Cutting down a tree using a chainsaw takes a lot of planning and preparation. One tiny error in setting up the arrangements, and you could get wounded or even lose your life.
But, we will provide a step-by-step guide to making sure that you’re ready and know everything required to pull off this job.
Required Equipment
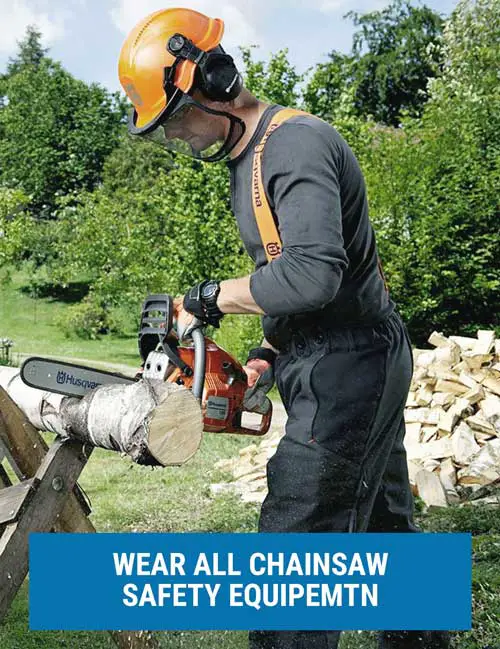
- Protective Glasses
- Headphone
- Helmet
- Chaps
- Gloves and non-slip boots
- Chainsaw
- Rope
- Chalk
- Warning signs
- Wedge
- Sledgehammer
1. Measure The Size
Measuring how big the tree is and finding out where the tree will fall is crucial. It’s going to be a disaster if there’s any miscalculation and it falls over someone else’s property. Then you have to check whether your chainsaw is the right size for the job.
2. Secure The Area
The perimeter around the tree has to be secured so that no damage is caused to people or animals close by. This is a must in forests or open spaces. Place warning signs outside of the perimeter and chase away the animals to ensure no one is near.
3. Determine The Fall Direction
When you cut down a tree, the most important thing is to figure out where to make it fall. This is quite simple, and after choosing where the tree will fall, you have to see if there is an open space more extensive than the tree’s height in that direction. A more straightforward fall path results in lesser problems.
Which direction the tree is leaning has heavier branches, and the course of the wind would play a role in selecting a fall direction, as making the tree fall towards that direction is more accessible.
Recommended Chainsaw: Husqvarna 20 Inch 450 Rancher II Gas Chainsaw
4. Choose An Escape Route
Before starting your chainsaw, prepare an escape route so that you’re in a safe place to stand as the tree falls. The rule of thumb is 45 degrees from either side of the cutting position.
5. Prepare The Tree
Pruning branches that are shoulder height or below before cutting the tree will give you better clearance. You have to be sure that there’s no debris, rocks, vines obstructing your way as you cut the tree.
6. Mark The Places To Cut
To cut a tree with a chainsaw, you would need 3 cuts. 2 of them are on the face and one at the back. The face cuts create a notch.
The notch is made on the side where you want the tree to fall. There are 3 kinds of face cuts to create a notch:
- Open-Faced: This cut has a notch of about 90 degrees, in some cases 70 degrees.
- Hum-Bolt: The top part of the cut is flat while the bottom is angled, creating a 45-degree notch.
- Conventional: Opposite of Humbolt cut, where the top cut is angled, and the bottom is flat, creating a 45-degree notch.
The back cut creates a hinge as it disconnects the tree from the stump.
Mark the places so you have a visual cue where to cut, making it easier to control your chainsaw.
7. Start The Cutting Process
Start your chainsaw and make the first cut to make a notch. Starting with the top cut, the waist level is generally a good height, allowing ample room for the bottom amount. It would help if you stopped the chainsaw when the cut reaches a depth of about 20-25% of the diameter of the tree.
Next is the bottom cut. Again, you should start at a proper level for your angle as you keep cutting. Stop cutting when the chainsaw reaches the endpoint of the top cut.
Finally, proceed towards the back cut. Move to the back while maintaining an angle and slowly but firmly cut. Make the back cut at the exact elevation for open-faced notches and 1 inch higher than the flat cut for the Humbolt and conventional incisions.
10% of the trunk’s width is a standard width for back cuts. Therefore, you should stop cutting 2-5 inches away from the notch.
When the back cut is done, the tree should start to fall. If not, insert a wedge in the back cut and smash it with a sledgehammer, making the wedge act like a lever giving it a push to tip over.
As the tree begins to topple, keep firm eye contact and steadily proceed towards the escape route you previously marked.
8. Limbing and Bucking
After the tree has fallen, you need to remove limbs and make logs. It is called “limbing.” Start from the top to the base. A stable footing in a dry place is a must; otherwise, you might risk an injury.
After the limbs are reduced, the same process needs to be applied to the trunks. This is known as “bucking,” a time-consuming procedure. Like limbing, you should start from the top and work your way to the base.
The length of each section is determined by where the logs would end up, 1 or 2-foot sections for home and 4-foot sections for a mill.
Tips
- Get a good chainsaw. For average-sized trees, 18-inch saws are enough.
- Use chalks to mark escape routes.
- Don’t move directly behind a tree as it could fall over you.
- If it’s a rotten or damaged tree, cutting it will be difficult compared to a standard tree as there could be unexpected situations. Be careful in that case.
- Never take your eyes off the tree.
- Please don’t stand in front during face cut, do it from the sides.
To Conclude
If you follow everything until now, you should have expert-level knowledge of cutting down a tree with a chainsaw. Don’t keep your chainsaw waiting. Put your safety gear on, make up the arrangements, and let it rip.
Read More